

Installing a heat exchanger gasket in a plate - fin heat exchanger is a crucial process that ensures the efficient and reliable operation of the heat exchanger. As a heat exchanger gasket supplier, I have extensive experience in this area and would like to share a comprehensive guide on how to carry out this installation.
Understanding the Plate - Fin Heat Exchanger and Gaskets
Before we start the installation process, it's essential to understand the basic components. A plate - fin heat exchanger consists of a series of thin plates separated by fins. These fins increase the surface area for heat transfer between two fluids. The heat exchanger gaskets play a vital role in sealing the spaces between the plates, preventing fluid leakage and ensuring that the heat transfer process occurs effectively.
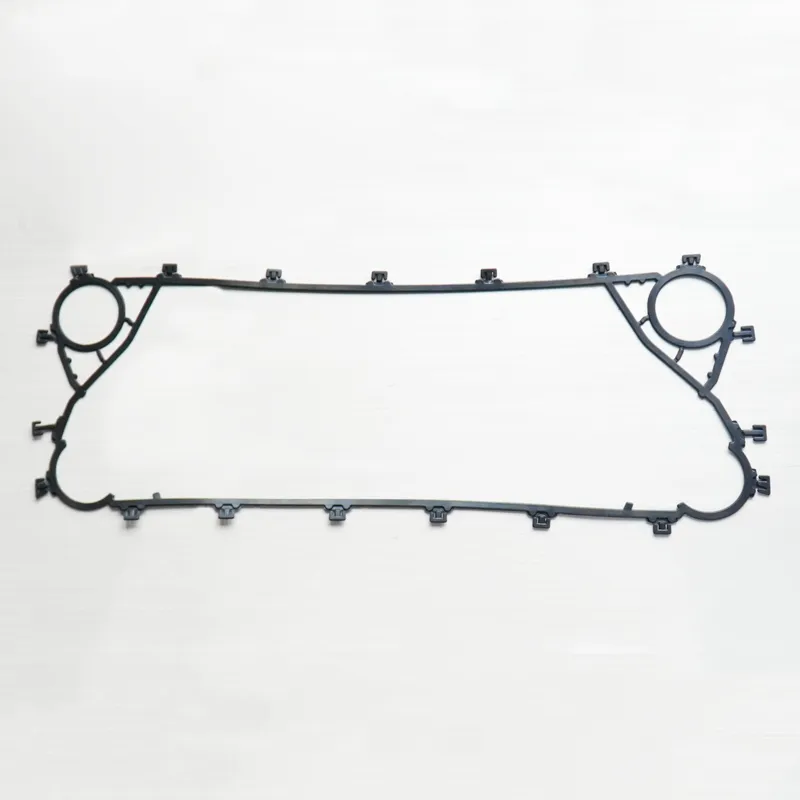
We offer a wide range of high - quality gaskets, including Heat Exchanger Rubber Gasket, Heat Exchanger Gasket, and Plate Type Heat Exchanger Gasket. These gaskets are made from different materials such as rubber, graphite, and PTFE, each with its own advantages and suitable for different operating conditions.
Pre - installation Preparations
- Inspect the Heat Exchanger Plates
- Carefully examine the heat exchanger plates for any signs of damage, such as cracks, scratches, or corrosion. These defects can affect the sealing performance of the gaskets. If any damaged plates are found, they should be repaired or replaced before proceeding with the gasket installation.
- Clean the plates thoroughly to remove any dirt, debris, or old gasket material. A clean surface is essential for proper gasket adhesion. You can use a suitable cleaning agent and a soft brush or cloth to clean the plates. Rinse the plates with clean water and dry them completely.
- Select the Correct Gasket
- Based on the specifications of the heat exchanger, including the type of fluids, operating temperature, pressure, and chemical compatibility, choose the appropriate gasket material and size. Our technical team can provide professional advice to help you make the right selection.
- Check the gasket for any defects, such as cuts, tears, or uneven surfaces. A defective gasket may not provide a proper seal, leading to fluid leakage.
- Gather the Necessary Tools
- You will need tools such as a gasket adhesive, a scraper, a brush, a torque wrench, and a set of bolts and nuts. Make sure the tools are clean and in good working condition.
Gasket Installation Process
- Apply the Gasket Adhesive
- Apply a thin, even layer of gasket adhesive to the gasket grooves on the heat exchanger plates. The adhesive should be applied according to the manufacturer's instructions. Make sure the adhesive covers the entire groove area.
- Use a brush to spread the adhesive evenly. Avoid applying too much adhesive, as it can cause the gasket to shift during installation or lead to excess adhesive squeezing out, which may contaminate the fluid flow paths.
- Position the Gasket
- Carefully place the gasket in the groove on the heat exchanger plate. Align the gasket properly with the plate, ensuring that all the holes and ports match up correctly.
- Press the gasket firmly into the groove to ensure good adhesion. You can use a scraper or a similar tool to gently press the gasket into place, making sure there are no air bubbles or wrinkles trapped between the gasket and the plate.
- Assemble the Heat Exchanger Plates
- Stack the heat exchanger plates together, with the gaskets in between. Make sure the plates are aligned correctly and that the gaskets are not pinched or damaged during the assembly process.
- Insert the bolts and nuts through the holes in the plates. Tighten the bolts gradually and evenly using a torque wrench. Follow the recommended torque values provided by the heat exchanger manufacturer. Over - tightening the bolts can damage the gaskets and plates, while under - tightening can result in a poor seal.
- Final Inspection
- After assembling the heat exchanger, conduct a final inspection to ensure that all the gaskets are properly installed and that there are no visible signs of damage or misalignment.
- Check for any gaps or unevenness between the plates. If any issues are found, disassemble the heat exchanger and correct the problem before proceeding.
Post - installation Testing
- Pressure Test
- Conduct a pressure test on the heat exchanger to check for any leaks. Slowly increase the pressure to the operating pressure and hold it for a certain period of time. Monitor the heat exchanger closely for any signs of fluid leakage.
- If a leak is detected, identify the source of the leak and take appropriate measures to fix it. This may involve tightening the bolts further, replacing a damaged gasket, or repairing a damaged plate.
- Thermal Performance Test
- Once the pressure test is successful, start the heat exchanger and monitor its thermal performance. Check the inlet and outlet temperatures of the fluids to ensure that the heat exchanger is operating efficiently.
- Compare the actual performance with the design specifications. If there are any significant deviations, further investigation may be required to identify and resolve the problem.
Conclusion
Installing a heat exchanger gasket in a plate - fin heat exchanger requires careful preparation, proper installation techniques, and thorough testing. By following the steps outlined in this guide, you can ensure a successful installation and optimal performance of the heat exchanger.

As a reliable heat exchanger gasket supplier, we are committed to providing high - quality gaskets and professional technical support. If you have any questions or need assistance with gasket selection or installation, please feel free to contact us. We look forward to discussing your specific requirements and working with you to meet your heat exchanger needs.
References
- Heat Exchanger Design Handbook, various authors
- Manufacturer's manuals for plate - fin heat exchangers
- Industry standards for heat exchanger gaskets and installation procedures